Windows is not my Pi
TL;DR
Use rpi4-ethernet-over-usb bash scripts to configure local Ethernet-over-USB on Raspberry Pi 4.
Priming
When using Raspberry Pi 4 as an embedded system on devices, it is convenient to have a web server as the device user interface. Modern browsers expose sufficient functionality for web apps to perform on par with desktop and mobile applications. This type of Web User Interface (WUI) deployment is particularly attractive due to its unmatched cross-platform compatibly, no installation requirements and, potentially, zero configuration.
While Raspberry Pi 4 has Ethernet interface and it is fairly easy to configure on TCP/IP networks, it might still be challenging for an end user to connect it to their computer or an existing network. The recurring problem is the static IP versus DHCP configuration.
If a device with embedded Raspberry Pi 4 is deployed using default DHCP client configuration, the end user could expect it to work when connected directly to the computer Ethernet port. It would, of course, fail as most personal computers are also by default configured as DHCP clients.
Motivation
A seemingly simple solution is to provide the end user with instructions of how to configure their computer Ethernet adapter with a static IP address and also configure embedded Raspberry Pi 4 with static IP. Such configuration should work with direct connection between Raspberry Pi and a user computer. Unfortunately, it would also fail when connecting to an existing network with DHCP server. Additionally, user's computer would no longer work with networks that are running DHCP server.
Well, static IP addresses would work in some networks with DHCP server and some more secure networks can be configured to allow certain static IP addresses. That, however, only adds more complexity to an already complex configuration problem.
Another solution to this network configuration issue could be adding a small display to Raspberry Pi with some buttons to switch between static and dynamic IP address configurations, provide some connection diagnostics indicators and to allow users to manually set custom static IP address. In many cases this solution is less desirable as it increases device cost and complexity, and it is also no longer zero-configuration device.
Yet another solution could be providing an Ethernet router along with the device to allow user's computer and Raspberry Pi to be both configured as DHCP clients. This might be a good solution if there are multiple devices that should be connected to the network simultaneously, and also if the devices are large and expensive enough in compare to the size and cost of the router. In other cases, this solution is less good. Additionally, routers require a separate power supply.
One more solution could be connecting an additional Ethernet adapter to Raspberry Pi as a USB dongle or a HAT. Then the native Ethernet port can be configured as DHCP client and the external Ethernet as static IP. Thus, the native Ethernet port can be connected to a network with DHCP server and the external Ethernet port can be used to connect Raspberry Pi directly to user's computer. Unfortunately, apart from an extra cost this solution would introduce an additional confusion - which port is which, and it does not eliminate the need of user's computer configuration with static IP address.
Ethernet-over-USB
It seems that there is no good way of configuring Raspberry Pi 4 Ethernet adapter as a mean to provide zero configuration device WUI. Alternative approach could be to use USB interface for direct computer connection and to reserve Ethernet for networks with DHCP server.
Simple Configuration from Pi Zero
In order to access device WUI via USB, the USB driver should support some kind of Ethernet-over-USB bridging. Linux kernel supports such capability, known as "USB gadget", for more than a decade. A brief internet search reveals that some more recent Raspberry Pi devices allow such USB configuration - including Raspberry Pi 4. Many internet forums and posts seem to suggest configuration that was originally used on Pi Zero devices. On Pi 4, it should be used with USB-C port that is also normally used for power. This configuration is very simple:
- On Pi 4, add
dtoverlay=dwc2line to the end of/boot/config.txtfile. - Add
modules-load=dwc2,g_etherstring afterrootwaitin/boot/cmdline.txt.
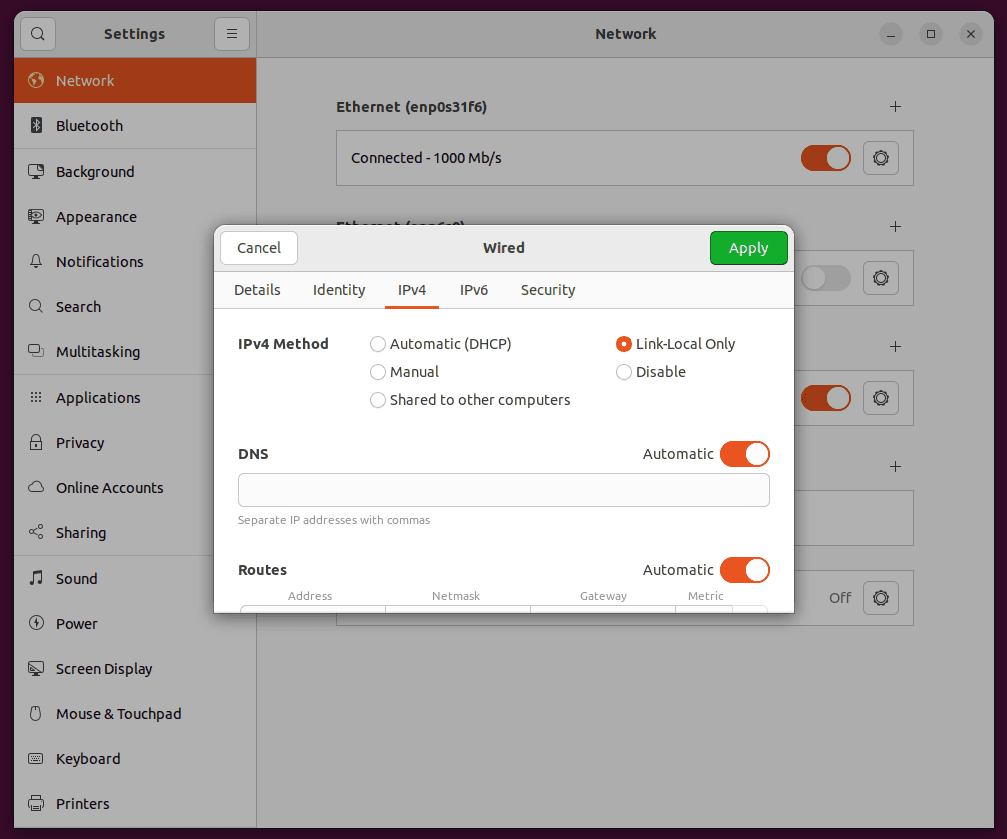
Unfortunately, on my Ubuntu 22.04 LTS systems it only works with "Link-Local Only" enabled:

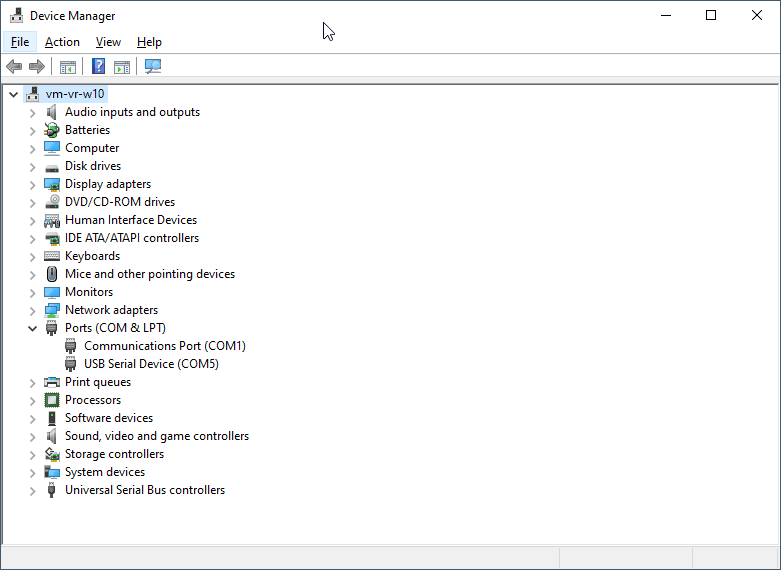
Windows 10 and Windows 11 recognise such USB configuration as COM port:

Ben Hardill's Configuration
Further internet search has revealed an excellent blog
post by Ben
Hardill. The configuration Ben proposes is more involved, but it demonstrates
how to setup kernel's usb_gadget, including USB device descriptor, from shell
and how DHCP server can be used at Raspberry Pi side, so the host computer does
not require setting IP address manually. In my tests, Ben's configuration worked
perfectly well on Ubuntu 22.04 LTS. However, Windows 10 and Windows 11 still
recognised it as a COM port.
Ramblehead's Configuration
Unfortunately, Windows support is important. Also, I would prefer to have
systemd configuration over using /etc/rc.local. So, I started working on my
own solution based on Ben's work. Further Windows-specific internet search has
revealed
this
and
that
threads on Microsoft answers forum. Reading those threads led me to another
brilliant project from LEGO MINDSTORMS EV3 community:
ev3-systemd.
It looks like they have cracked this problem in 2017 or earlier!
I blended EV3 and Ben's configurations with my own additions. The resulting configuration is little bit more complex, but it works on both Linux and Windows with no additional changes, simultaneously supporting RNDIS and CDC-ECM USB protocols. To spare myself (and possibly others) from replaying this configuration in the future manually, I wrote a few automation scripts. With these scripts, to configure Raspberry Pi 4 to local Ethernet-over-USB gadget mode execute the following commands in Pi terminal:
$ cd
$ git clone https://github.com/ramblehead/rpi4-ethernet-over-usb.git
$ cd rpi4-ethernet-over-usb
$ sudo ./setup-usb.sh
$ sudo ./setup-dnsmasq.sh
Then reboot Raspberry Pi two times and it should be ready to connect to any host computer.
The above commands assume that Raspberry Pi is connected to the Internet to
access GitHub. If it is offline, use some other ways to copy
rpi4-ethernet-over-usb repository to your Raspberry Pi home directory.
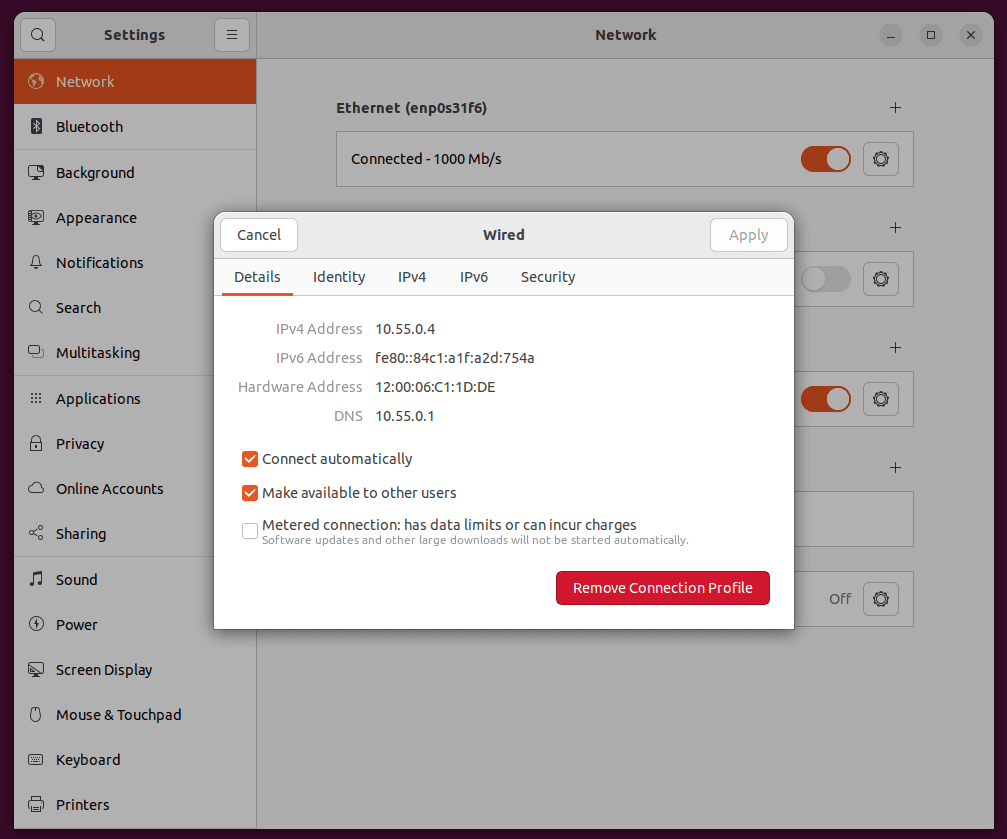
The following figures are example screenshots of how correct configuration should look like on Ubuntu:

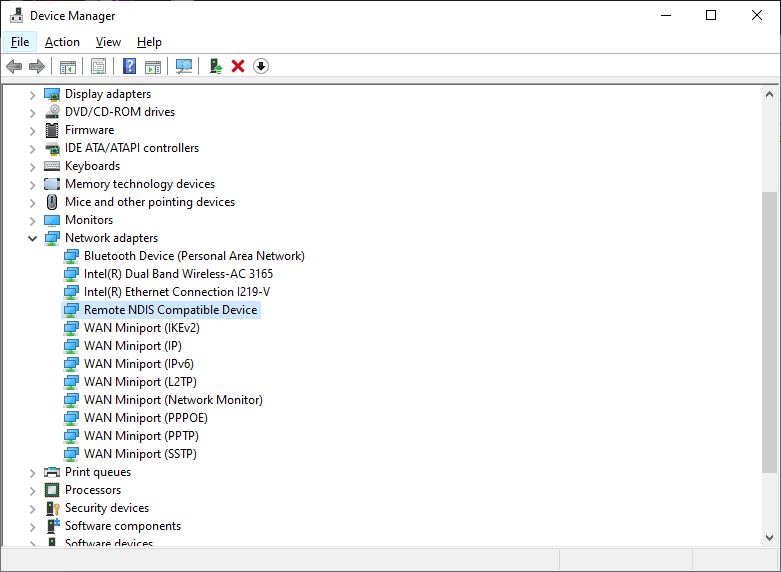
and on Windows:

If you tested this configuration on other host platforms or have some comments or suggestions, feel free to share them below. Any bug reports or requests regarding automations scripts should, preferably, be reported at GitHub issues